 Save to Pinterest
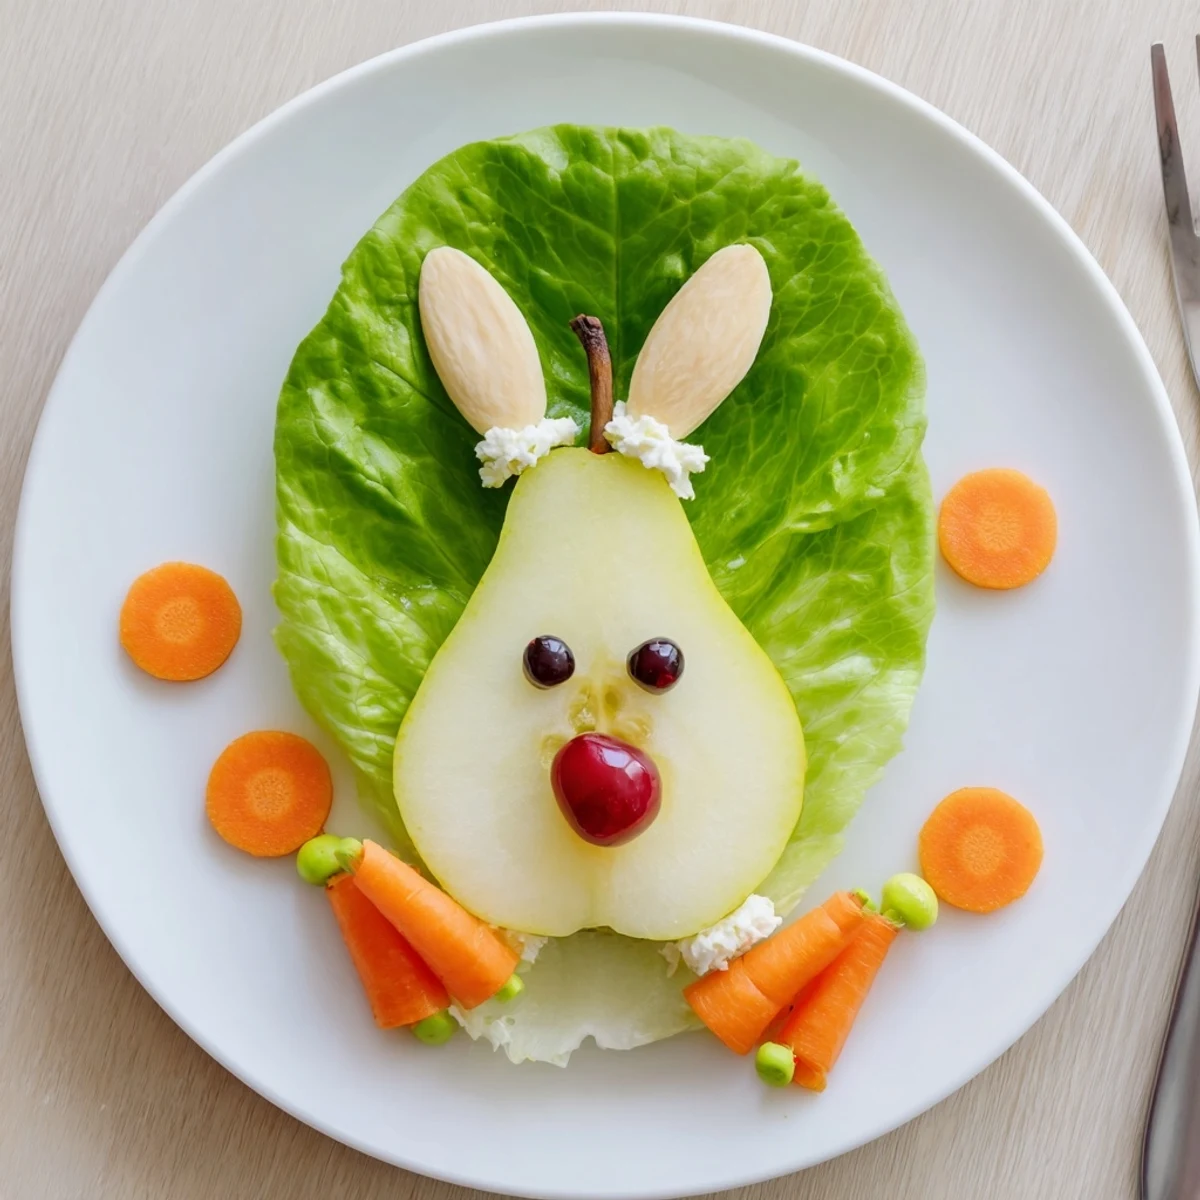
 These charming pear bunnies bring playful elegance to your table in just 15 minutes. Each tender pear half becomes a delightful character, perched on crisp lettuce with cottage cheese tails, almond ears, and carrot whiskers. The combination of sweet fruit, creamy cheese, and fresh vegetables creates an appealing presentation that captivates children and adults alike.
Perfect for Easter celebrations, spring gatherings, or whenever you want to add whimsy to mealtime. The simple assembly requires no cooking, making it an ideal activity to involve young helpers in the kitchen.
I stumbled across this recipe in my grandmothers church cookbook from the 1960s, tucked between gelatin molds and potato salad classics. The page was stained and dog-eared, which seemed like a good sign. My daughter was turning six and wanted an Easter party, so I decided these retro bunnies deserved a comeback. The kids went absolutely wild for them, and honestly, so did the adults.
That Easter afternoon became legendary in our neighborhood. Three moms asked for the recipe, and my daughter insisted we make them for every holiday afterward. Theres something about food that looks back at you with raisin eyes that just makes everyone smile.
Ingredients
- 2 ripe canned or poached pear halves: Canned pears work beautifully here since they are already tender and hold their shape perfectly during assembly
- 4 large lettuce leaves: Iceberg or butter lettuce create the best grassy foundation for each bunny to sit upon
- 1 medium carrot: This becomes the whiskers and tiny feet so choose one that is straight and firm for easier cutting
- 4 tbsp cottage cheese: The fluffy texture mimics a cotton tail perfectly while adding a nice protein boost
- 8 mini raisins or currants: These create the most expressive little bunny eyes you have ever seen
- 4 sliced almonds: The natural curve mimics perky rabbit ears beautifully
- 4 maraschino cherries or red grapes: A bright red nose makes each bunny personality pop
- 1 tbsp mayonnaise: This optional addition makes the cottage cheese tail look extra fluffy and voluminous
Instructions
- Create the bunny foundation:
- Arrange one lettuce leaf on each small plate like a little patch of grass, then place a pear half cut side down in the center.
- Form the fluffy tail:
- Scoop a small mound of cottage cheese at the narrow end of each pear and add a tiny dab of mayonnaise for extra fluffiness if desired.
- Prepare the carrot details:
- Slice your carrot into thin rounds and carefully cut small triangle feet and delicate whisker strips using a paring knife.
- Attach the facial features:
- Press two raisins into each pear for eyes and add a cherry or grape nose at the front where the face naturally forms.
- Complete the bunny assembly:
- Position almond ears upright at the wide end and arrange the carrot feet and whiskers at the front.
 Save to Pinterest
 My niece now requests these for her birthday every year, even though it is in July. They have become our family go to for anytime we need a little joy on the table.
Making It Your Own
Once you master the basic bunny shape, the variations are endless. We have used whipped cream for a sweeter tail, and fresh berries work beautifully for noses if you want to avoid the artificial cherry color.
Kid Friendly Assembly
This recipe shines when you let children help with the decorating. They can place the eyes, noses, and tails while an adult handles the carrot cutting. The resulting bunnies might be a little asymmetrical but that just adds to their charm.
Make Ahead Strategy
You can prep all your components up to a day in advance and store them separately in the refrigerator. Arrange the lettuce and pears on plates, then keep the carrot pieces, eyes, and noses in small containers.
- Assemble everything within 30 minutes of serving to prevent the cottage cheese from warming
- Keep extra raisins handy since tiny fingers sometimes eat the eyes during assembly
- Have damp paper towels ready to clean sticky fingers between bunnies
 Save to Pinterest
 These silly bunnies have become more than just a recipe at our house. They are proof that sometimes the most memorable foods are the ones that make us laugh.
Recipe Questions & Answers
- → How far in advance can I make these pear bunnies?
-
For best results, assemble these charming creations within 30 minutes of serving. The pears may oxidize slightly and the cottage cheese can become watery if left too long. Keep components prepared separately and arrange just before your gathering begins.
- → Can I use fresh pears instead of canned?
-
Absolutely. Fresh pears work beautifully when poached until tender in light syrup or spiced water. This allows you to control sweetness while achieving the perfect soft texture for shaping. Bosc or Anjou varieties hold their shape particularly well during preparation.
- → What alternatives work for children with nut allergies?
-
Instead of almond ears, try thin slices of fresh pear skin, cucumber ribbons, or carefully carved apple pieces. These create equally adorable bunny ears while keeping the dish safe for those with tree nut sensitivities to maintain the playful presentation.
- → How do I prevent the pears from turning brown?
-
Toss fresh pear halves gently in lemon juice or a mixture of water with vitamin C powder immediately after cutting. This simple step preserves their lovely pale color and keeps your bunny creations looking fresh and appealing for presentation.
- → Can I make this dairy-free?
-
Certainly. Substitute cottage cheese tails with coconut cream, dairy-free whipped topping, or even small scoops of dairy-free cream cheese. Mayonnaise can be replaced with avocado mash for the tails, maintaining the fluffy appearance while accommodating dietary needs.
- → What other decorations can I add?
-
Get creative with fresh herb sprigs for tiny tails, shredded coconut for fluffy texture, or even small pieces of bell pepper for colorful accents. Mini chocolate chips, blueberries, or pomegranate seeds also make charming eye alternatives that children adore.