 Save to Pinterest
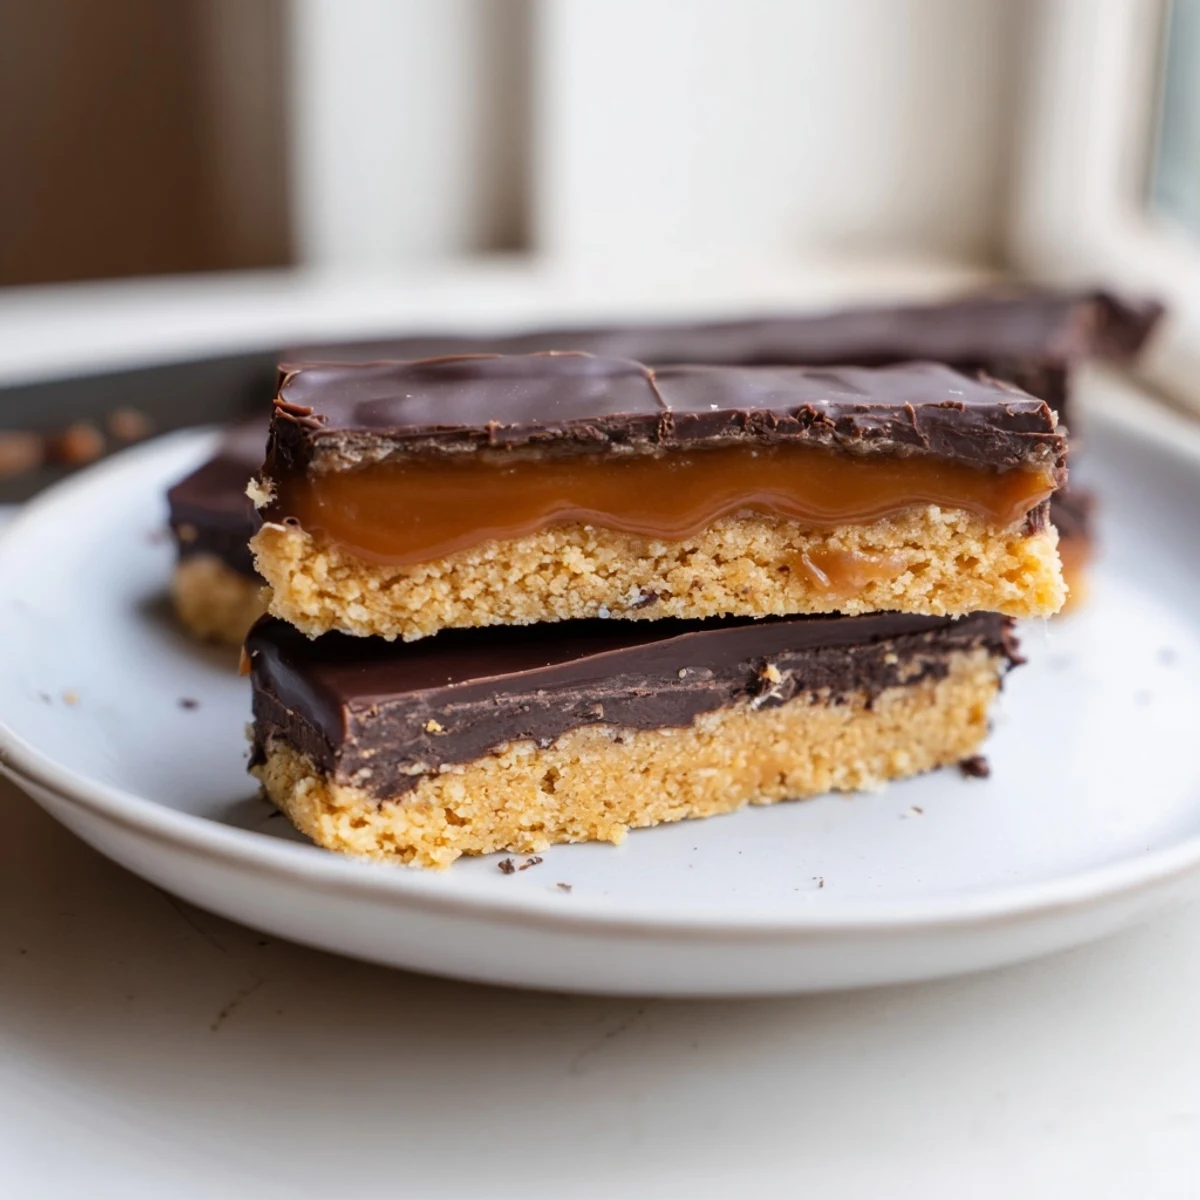
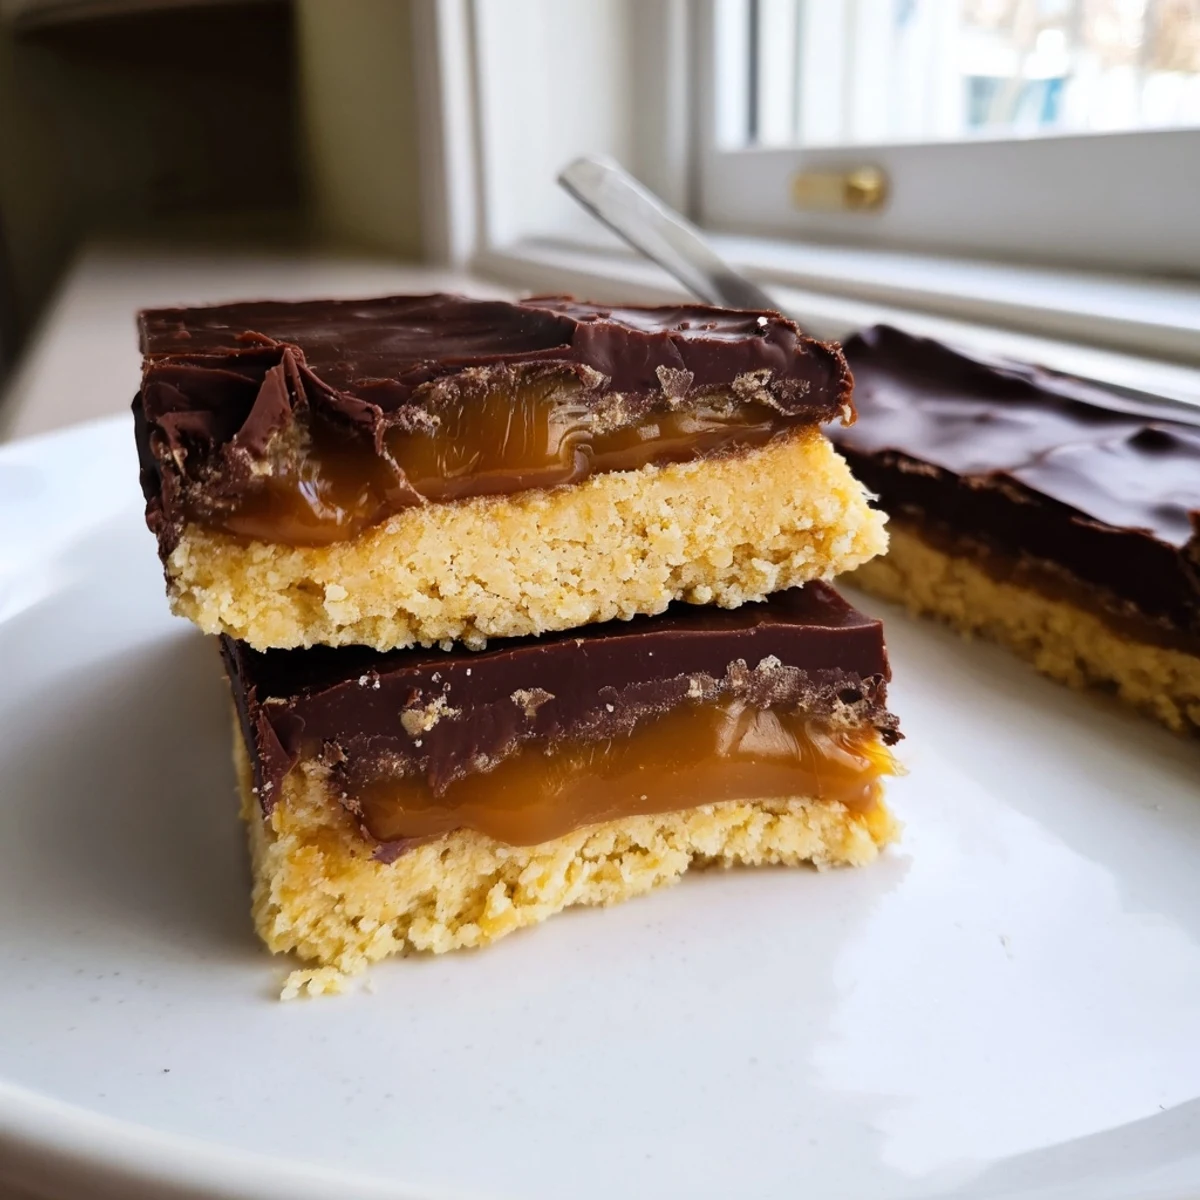
 These wholesome bars capture all the beloved flavors of classic Twix with nourishing ingredients. A buttery almond-coconut crust forms the foundation, topped with velvety caramel made from Medjool dates and almond butter. The crowning touch is a silky dark chocolate layer that creates the perfect sweet finish.
Each layer comes together quickly—just mix, press, blend, and pour. Most of the time is hands-off chilling while the bars set. The result is twelve perfectly portioned treats that satisfy sweet cravings without processed sugars or artificial ingredients.
My sister texted me at 11 PM one night, rambling about how she just made healthy Twix bars and I needed to get over there immediately. I rolled my eyes because honestly, healthy candy usually tastes like disappointment, but one bite later I was sitting on her kitchen floor asking for the recipe. We ended up eating half the pan while watching terrible reality TV and laughing about how these actually taste better than the real thing.
Last summer I brought these to a potluck and watched them disappear in minutes. My friend Sarah, who claims to hate healthy dessert alternatives, cornered me in the kitchen demanding to know what was actually in them. Seeing her face when I listed just five ingredients for the caramel layer was honestly the highlight of my whole weekend.
Ingredients
- Almond flour and coconut flour: This combo creates a shortbread-like texture that crumbles beautifully when you bite down. The coconut flour absorbs moisture while almond flour provides that buttery richness we all love.
- Medjool dates: These are the secret weapon of the caramel layer. Look for plump, shiny ones and give them a quick squeeze before buying softer means theyll blend into silkier caramel.
- Almond butter: Creamy almond butter adds depth and keeps the caramel from being one-note sweet. Cashew butter works too if thats what you have in your pantry.
- Dark chocolate chips: I use 70% dark chocolate for that sophisticated snap and slight bitterness that balances the sweet caramel. Dairy-free options work perfectly here.
Instructions
- Build your crust foundation:
- Press the dough firmly into your lined pan, using the back of a spoon or measuring cup to create an even layer that will hold everything together beautifully.
- Create the magic caramel:
- Blend those dates until completely smooth, stopping to scrape down the sides and getting every last bit incorporated into a glossy, spreadable caramel.
- Layer it up:
- Spread your caramel over the chilled crust, then freeze until firm before pouring over that gorgeous melted chocolate topping.
- The final chill:
- Let everything set completely in the freezer, then slice with a warm knife for those clean, bakery-worthy edges.
 Save to Pinterest
 My niece now requests these for every family gathering instead of birthday cake, which I consider the ultimate compliment from a seven-year-old candy connoisseur.
Making Them Your Own
Sometimes I sprinkle flaky sea salt over the chocolate before it sets, and that salty crunch against the sweet caramel is absolutely divine. A friend adds a tablespoon of espresso powder to her crust for a mocha version that I cant stop thinking about.
Storage Secrets
These bars keep beautifully in the freezer for up to three months, though they never last that long in my house. I wrap individual bars in parchment paper for grab-and-go moments when I need something sweet but substantial.
Serving Suggestions
Try crumbling a bar over coconut yogurt or vanilla ice cream for an instant dessert upgrade. They are also incredible alongside a cup of strong coffee or tucked into lunchboxes for a midday treat.
- Cut them while slightly frozen for the cleanest edges.
- Let them soften for just a few minutes before eating.
- Store between layers of parchment paper to prevent sticking.
 Save to Pinterest
 There is something deeply satisfying about making candy that actually loves you back. These bars have become my go-to for bringing a little joy into everyday moments.
Recipe Questions & Answers
- → How long do these bars keep?
-
Store in an airtight container in the refrigerator for up to 2 weeks. For longer storage, freeze individual bars for up to 3 months. Thaw in the refrigerator before serving.
- → Can I make these nut-free?
-
Yes, substitute oat flour for the almond and coconut flours in the crust. Use sunflower seed butter instead of almond butter for the caramel layer. The texture will remain delicious.
- → What if my dates are dry?
-
Soak dates in warm water for 10-15 minutes before blending. Drain well and pat dry. This softens them for a smoother, creamier caramel consistency.
- → Do I need a food processor?
-
A high-speed blender works as well. For the crust, you can mix by hand or use a fork. The caramel layer requires some form of blending to achieve smoothness.
- → Can I use milk chocolate?
-
Dairy-free dark chocolate pairs best with the date caramel's natural sweetness. Milk chocolate will work but creates a sweeter final result. Choose quality chips with minimal additives.
- → Why coconut oil in the chocolate?
-
Coconut oil helps the chocolate set firmly at freezer temperatures and creates a satisfying snap when bitten. It also makes the bars easier to slice cleanly.