 Save to Pinterest
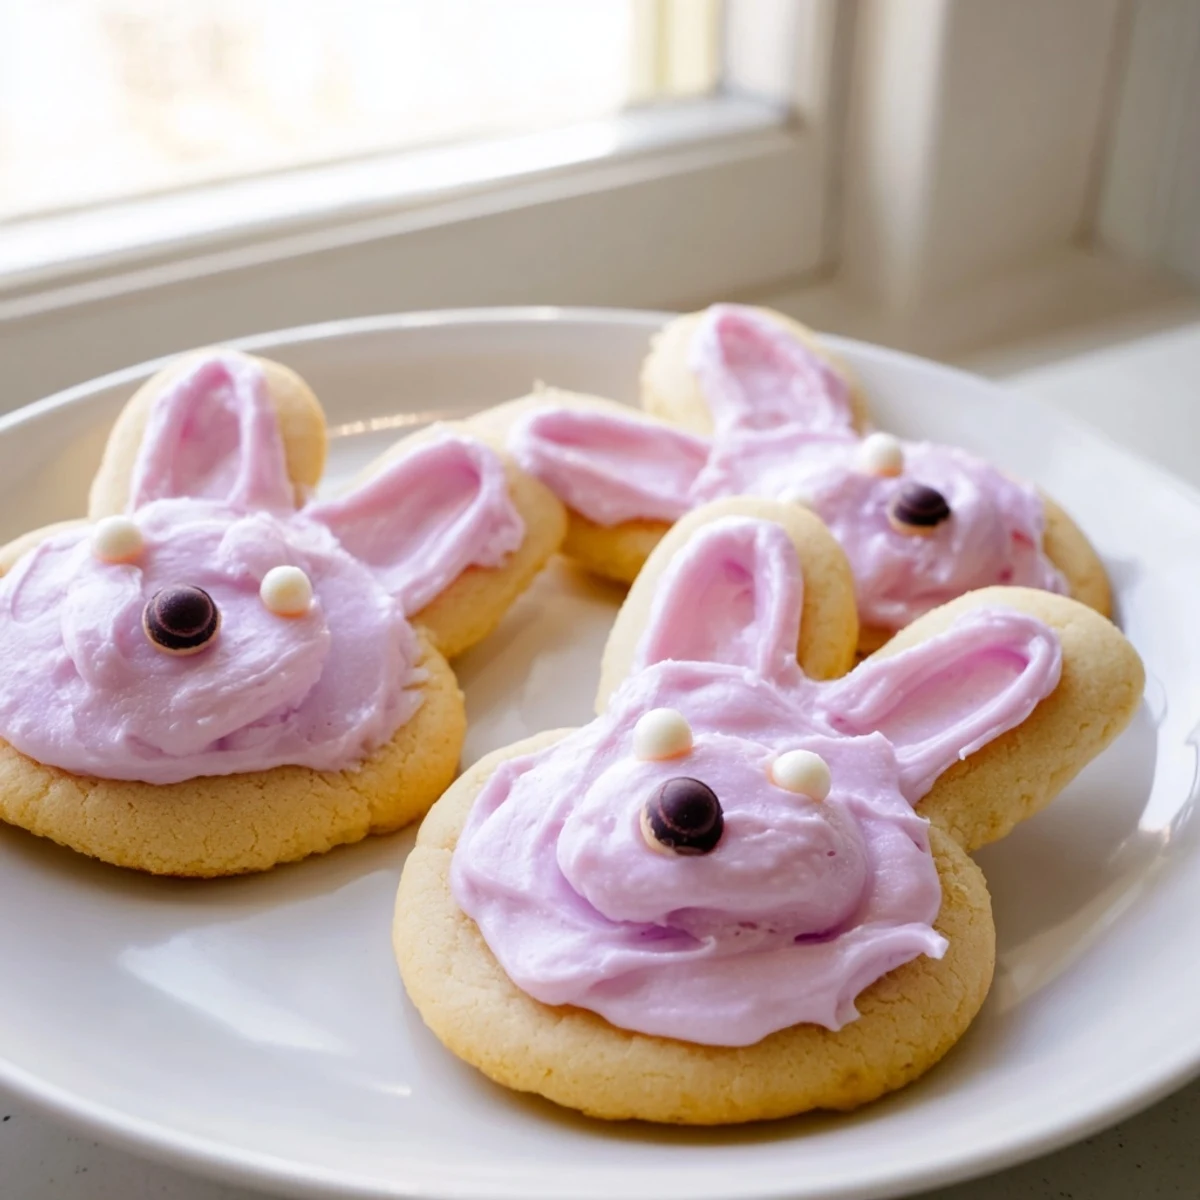
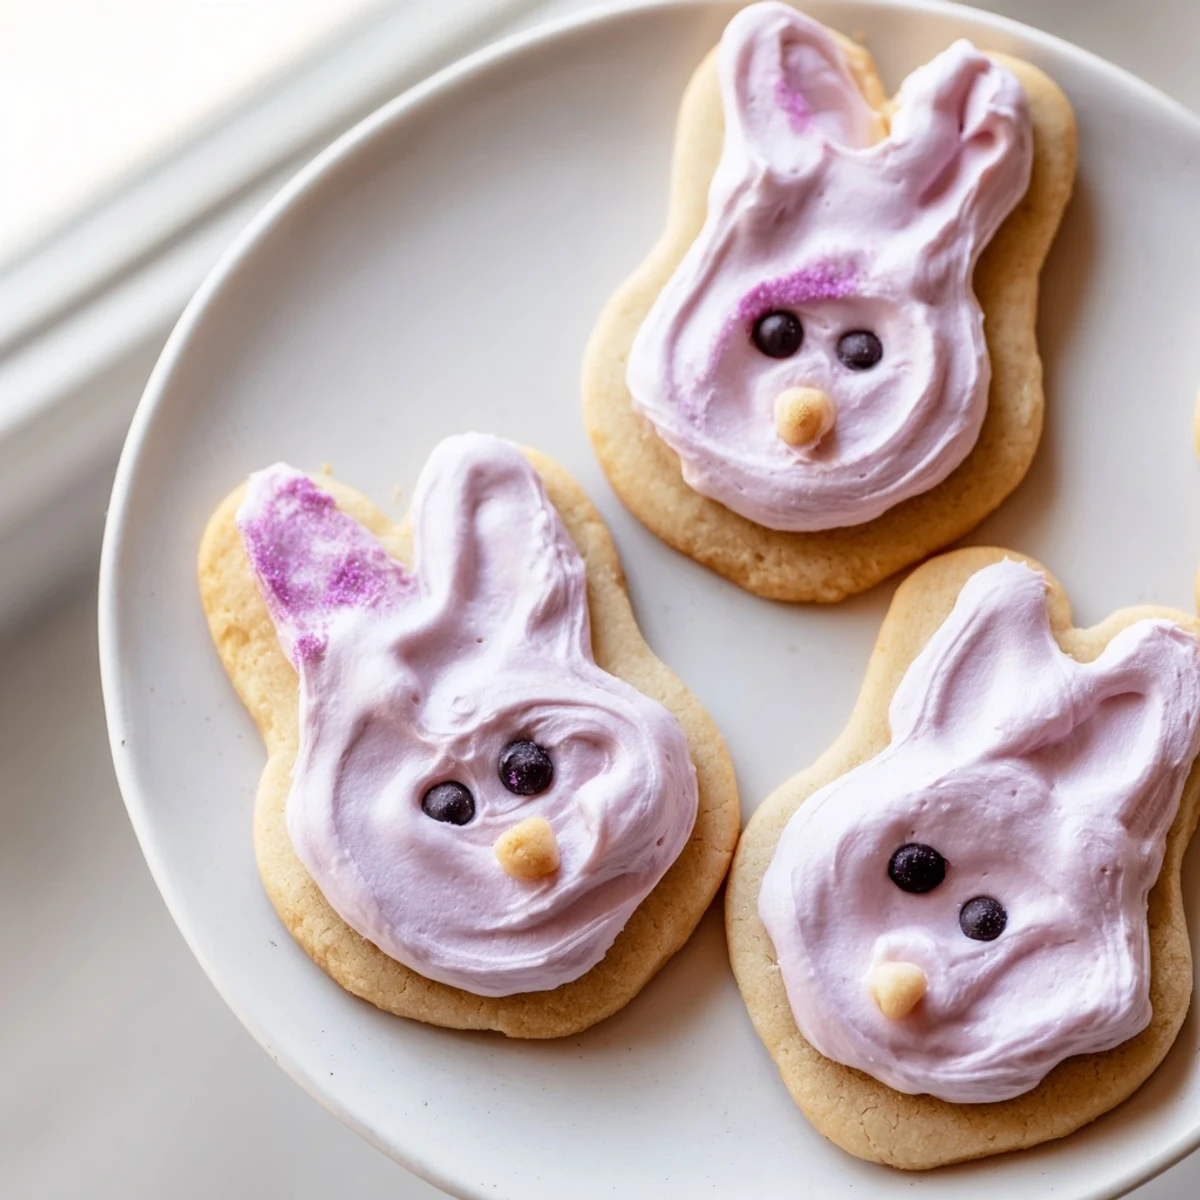
 These delightful bunny-shaped sugar cookies feature a rich, buttery base and are crowned with silky smooth buttercream frosting. The dough requires chilling for easy cutting and baking, resulting in tender treats that hold their shape beautifully. Decorate with pastel-colored frosting and candy eyes to create charming edible bunnies perfect for Easter baskets, spring parties, or festive dessert spreads. Make ahead and store for up to a week, or freeze undecorated cookies for later enjoyment.
The first Easter I made these, my kitchen counter looked like a pastel explosion gone wrong. I had pink buttercream on my nose, flour dusted across my glasses, and a very patient cat watching me chase bunny-shaped cutters across the floor. Sometimes the best holidays start with a little beautiful chaos.
Last spring my niece decided every bunny needed eyebrows, which turned into dots, which turned into full personalities. We named them all and nobody had the heart to eat Harold with the surprised expression. Thats what happens when food becomes fun before it becomes dinner.
Ingredients
- All-purpose flour (2 1/2 cups): The foundation that gives these cookies their structure and that satisfying snap when you bite into them
- Baking powder (1/2 teaspoon): Just enough lift to keep the cookies from turning into hard crackers while maintaining that classic sugar cookie texture
- Salt (1/4 teaspoon): A tiny pinch that wakes up all the other flavors and keeps the butter from feeling too heavy on your tongue
- Unsalted butter softened (3/4 cup): Use real butter here because nothing else gives you that rich melt in your mouth quality that makes these cookies special
- Granulated sugar (1 cup): Creates the perfect sweetness level while helping the cookies hold their cute bunny shapes during baking
- Large egg (1): Binds everything together and adds just enough richness to make the dough feel luxurious when you work with it
- Pure vanilla extract (2 teaspoons): Do not use imitation here because the real stuff blooms in the oven and fills your whole kitchen with warmth
- Unsalted butter for frosting (1 cup): Softened to room temperature so it whips up into that cloudlike texture that makes buttercream magical
- Powdered sugar (3 cups): Sifted if you can manage it because nobody wants lumpy frosting on their bunny faces
- Whole milk (2 tablespoons): Just enough to turn the butter and sugar into something spreadable and silky smooth
- Food coloring: Gel colors work better than liquid for achieving those dreamy pastel shades without making your frosting too thin
- Candy eyes and sprinkles: The finishing touches that transform ordinary cookies into characters with actual personalities
Instructions
- Preheat and prep:
- Get your oven to 350°F and line two baking sheets with parchment paper so nothing sticks and cleanup becomes almost too easy
- Whisk the dry stuff:
- Combine flour baking powder and salt in a medium bowl so they are evenly distributed before they meet the butter
- Cream butter and sugar:
- Beat softened butter and sugar for about 3 minutes until the mixture turns pale and fluffy like a sweet cloud
- Add egg and vanilla:
- Mix in the egg and vanilla until everything is incorporated and the dough looks smooth and glossy
- Combine wet and dry:
- Gradually add the flour mixture mixing just until the dough comes together because overworking makes tough cookies
- Chill the dough:
- Divide into two discs wrap in plastic and chill for at least 30 minutes because cold dough holds its bunny shape better in the oven
- Roll and cut:
- Roll dough to 1/4 inch thickness on a floured surface then cut out bunnies and place them 2 inches apart on your prepared sheets
- Bake:
- Bake for 8 to 10 minutes until edges just start turning golden because slightly underbaked means softer cookies
- Make buttercream:
- Beat butter until creamy then gradually add powdered sugar milk and vanilla until smooth and spreadable
- Decorate:
- Frost cooled cookies and add faces with candy eyes or sprinkles because this is where the magic actually happens
 Save to Pinterest
 My friendswait until the frosting sets before stacking them
 Save to Pinterest
 There is something wonderful about making food that makes people smile before they even take a bite. These bunnies have become my spring tradition because they turn ordinary moments into tiny celebrations worth remembering.
Recipe Questions & Answers
- → How far in advance can I make the cookie dough?
-
The dough can be prepared up to 24 hours ahead and stored wrapped in the refrigerator. For longer storage, freeze the dough discs for up to 3 months. Thaw overnight in the refrigerator before rolling and cutting.
- → What's the best way to achieve smooth buttercream frosting?
-
Start with room temperature butter and beat until completely creamy before adding powdered sugar gradually. Adding milk one tablespoon at a time helps achieve the perfect spreadable consistency. For extra smoothness, beat for 2-3 minutes after all ingredients are incorporated.
- → Can I make these cookies without a bunny-shaped cutter?
-
Absolutely! Use any seasonal cutter you prefer, or simply cut into rounds and decorate with spring designs. The buttery vanilla base works beautifully with any shape and the frosting technique remains the same.
- → How should I store decorated bunny cookies?
-
Once frosted and decorated, store in a single layer in an airtight container at room temperature for up to 3 days. If you need to stack them, place parchment paper between layers to protect the decorations. For longer storage, refrigerate for up to a week.
- → What type of food coloring works best for pastel frosting?
-
Gel food coloring provides the most vibrant pastel shades without altering the frosting consistency. Start with a tiny amount on a toothpick—you can always add more. Liquid coloring can make the buttercream too soft, so use sparingly if that's what you have available.